Establishing the characteristics of the soil in a garden, vegetable garden or orchard allows us to adequately choose the plants that best adapt to it. Otherwise we can understand how to intervene to correct it and modify it in our favor.
CLAYY SOILS
These soils are typically not very permeable: when it rains, the water stagnates on the surface for many hours, sometimes for days. By taking a handful, when wet, you can shape it like plasticine. When dry it is very hard and compact. The main problems of clay soil are
- poor drainage and frequent waterlogging
- consequent risk of asphyxiation and root rot
HOW TO CORRECT A CLAYY SOIL
The best thing to do to deal with this type of terrain is to add a few wheelbarrows of sand, until a layer of 10-20 cm is spread on the surface. The sand must then be dug or better integrated with a motor cultivator together with the existing soil, mixing it together to a variable depth: the greater the correct layer, the better the permeability of the soil and the lower the risk of water stagnation. It is usually difficult to work the soil above 40-50 cm, unless consistent efforts are made or the use of agricultural or professional machinery.
In clayey soils characterized by a strong risk of water stagnation there is another good precaution to take when we go to plant a tree or a bush: the planting hole will be as wide and as deep as possible, at least double the width and depth of the root ball that we insert. At the bottom of the hole we spread 15-20 cm of coarse material, which allows the water not to stagnate in the immediate circumstance of the young root system. The lateral volume of the hole can instead be filled with backfill, corrected as above by adding sand.
HOW TO DISSOLVE CLAYY SOIL
Then there is a further intervention that should be recommended: the addition of sand certainly improves the drainage capacity but will probably not completely resolve the tendency of clayey soils to mix and remain plastic when humid and hard when dry. To correct this aspect, a good quantity of organic materials must be added, even easily found ones:
- composed of leaves collected in the garden
- garden cuttings
- manure or manure
- peat and garden soil
- compost (perhaps produced with the home composter)
- earthworm humus
SANDY SOILS
Less frequent but still often difficult to cultivate, sandy soils offer excellent drainage and limited tenacity, factors that make them easily workable. Sandy soils have coarser grain, they are difficult to compact and you will feel the grains of sand distinctly by touch. The problems that may arise are:
- low water availability (they dry very quickly and retain little water)
- low fertility
HOW TO CORRECT SANDY SOIL
A sandy soil can be corrected by adding organic material as above: compost, manure, peat, dry leaves and lawn clippings, earthworm humus.
Sandy soils are often suitable for the cultivation of bulbous, tuberous or taproot horticultural plants, to which they offer little resistance to the growth of the underground (hypogeal) parts:
- carrots
- potatoes
- onions, garlic, shallots
- turnips and radishes
but also asparagus, fennel, tomato, aubergine, watermelon and melon.
In the garden, sandy soils can host (where the climate allows it) succulent and succulent plants, which are not very demanding from a water point of view and compatible with very draining and not very fertile soils.
HOW TO UNDERSTAND WHETHER THE SOIL IS CLAYY OR SANDY
If the qualitative analyzes described above have not given you convincing results, there is also the possibility of approximating an experiment that is still used in laboratories and which, by simplifying, can still give us a precious indication of the type of soil.
What we are going to evaluate is the soil texturethat is, the percentage distribution of the different particles, grouped according to their size.
- Once the soil sample has been collected (see below how to collect it correctly) it must be dried and ready to go sieved with a 2 mm mesh.
- Everything that does not pass the sieve (stones and gravel) constitutes it skeleton and can be removed: the skeleton should only be taken into consideration if it is present in a consistent manner and can cause problems for working the soil but this is normally not the case.
- In a 1.5-2 liter bottle we insert the sifted soil halfway and add water until it is almost full.
- We shake and let it settle for 12-24 hours.
- After this interval we should have the water in the upper part of the bottle rather clear and the soil settled at the bottom.
- In the lower parts we will find particles of larger caliber, which precipitated earlier as they were heavier: they constitute the share of sand (particles with a diameter between 2 mm and 0.005 mm).
- In the intermediate parts the limousinewith particles of caliber between 0.005 mm and 0.002 mm: this component has intermediate characteristics between sand and clay.
- The highest layer, often of a more yellowish colour, is made up of the finest particles with a diameter of less than 0.002 mm: this is theclay.
- We can therefore measure these layers and establish their presence as a percentage.
- These percentages must be inserted within the scheme known as the texture triangle which will result in the type of soil being examined.
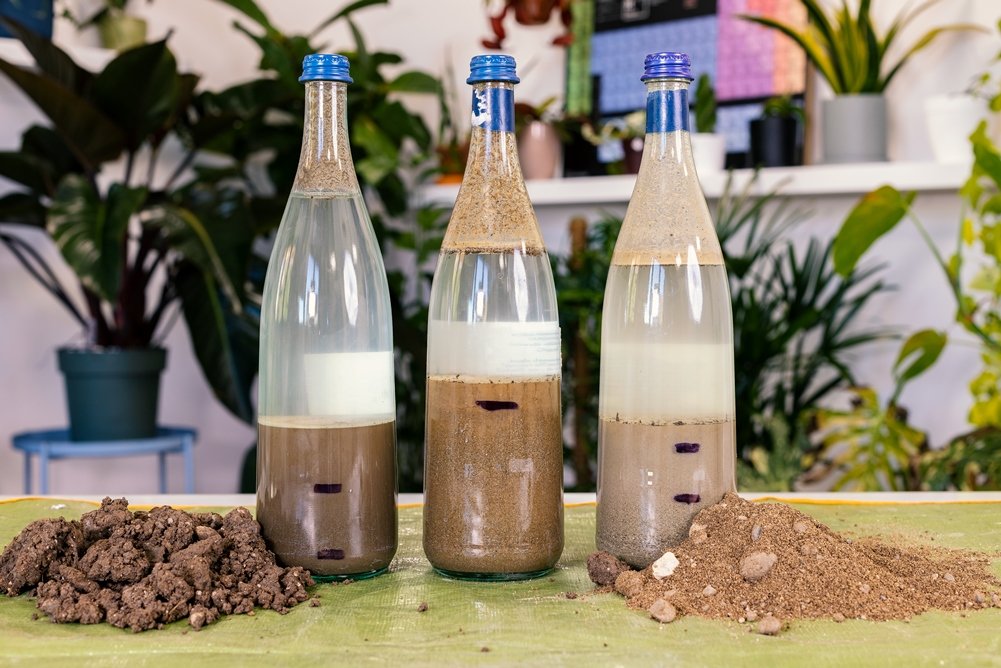
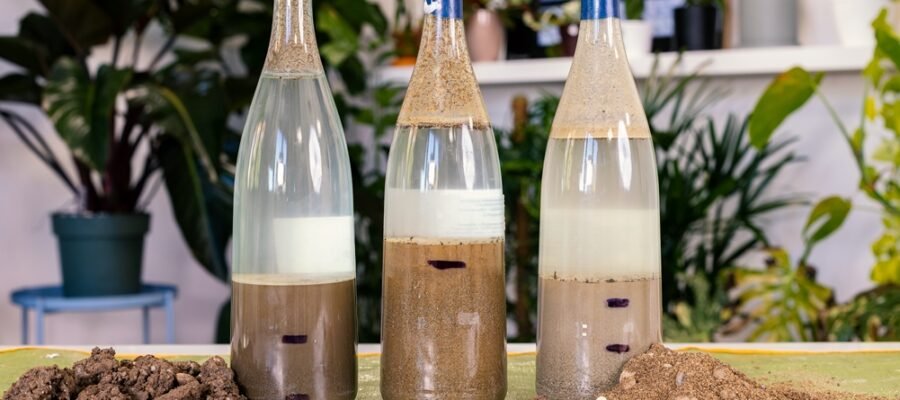
Below is the outcome of the analysis carried out on three samples taken in the fields near my nursery.
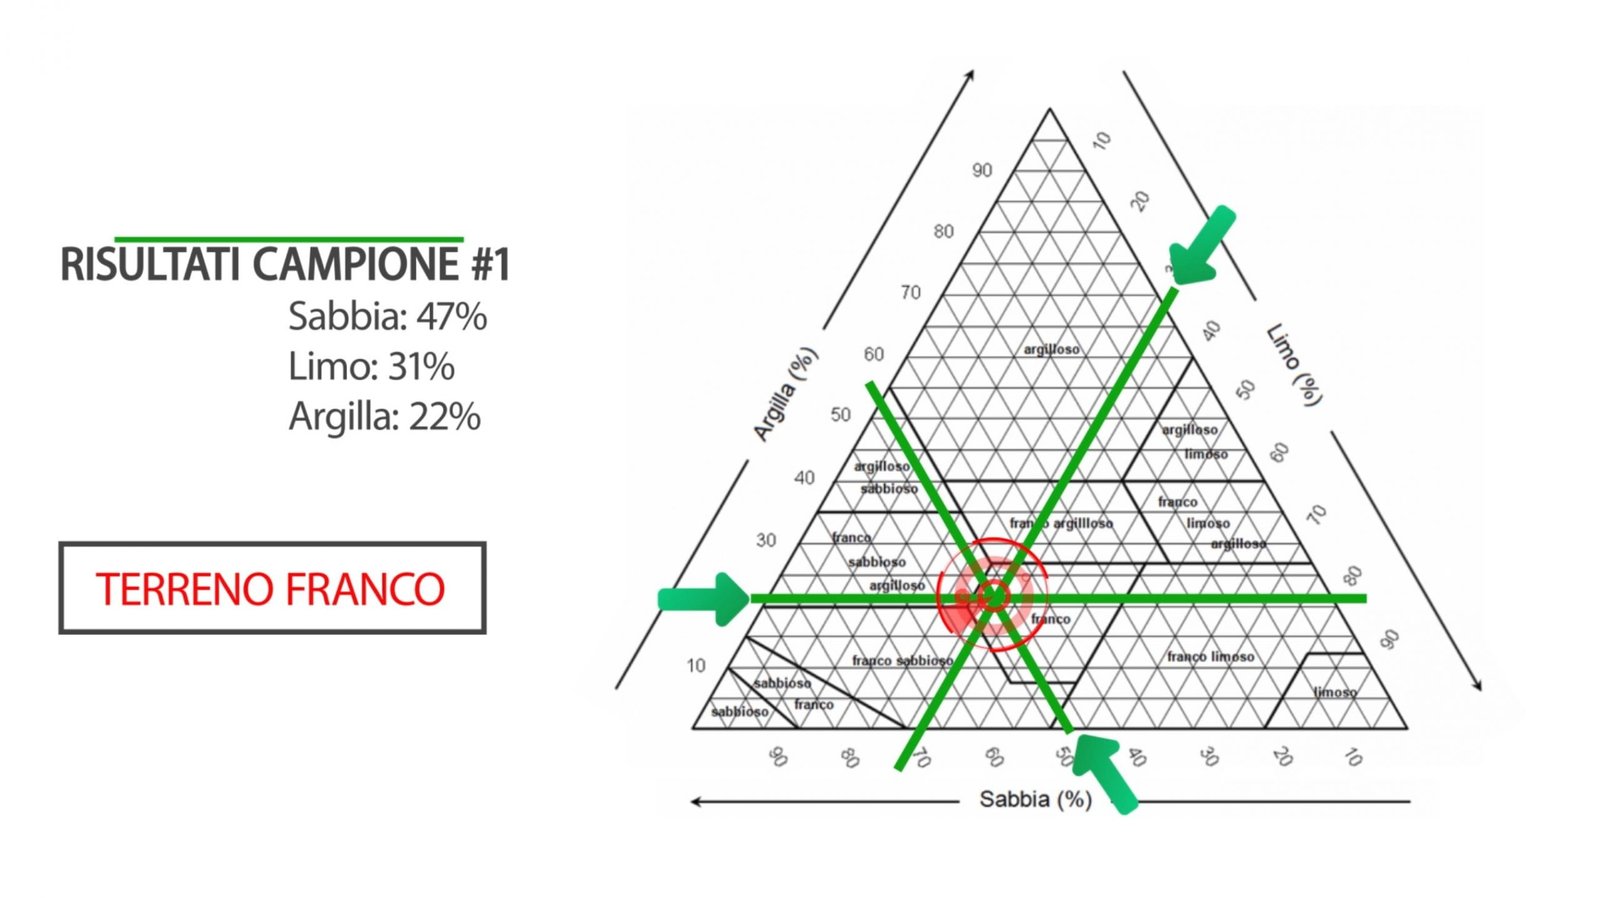
The first sample corresponds to a medium-textured soil: soils of this type have a good balance between sand, silt and clay, and are suitable for most crops. They have good availability of air and water, are permeable, fertile and easily workable. They are also called medium-textured soils.
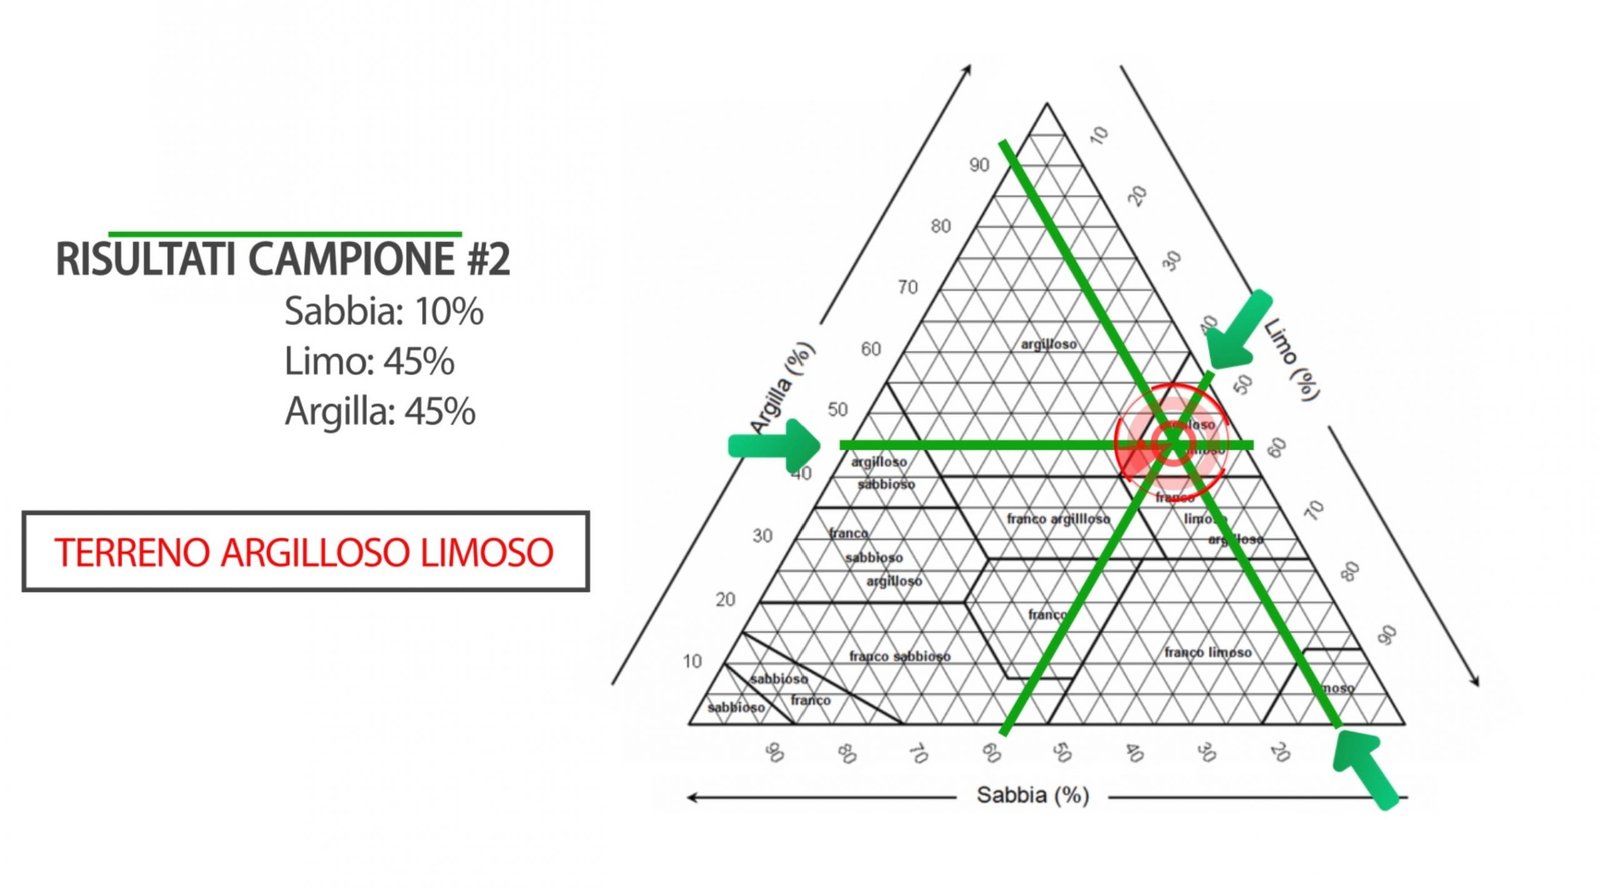
The second sample, however, has a limited amount of sand and has an excess of fine particles of silt and clay. It corresponds to a clayey-loamy soil. It is an asphyxiated and poorly permeable soil, inadvisable for most agricultural and ornamental crops.
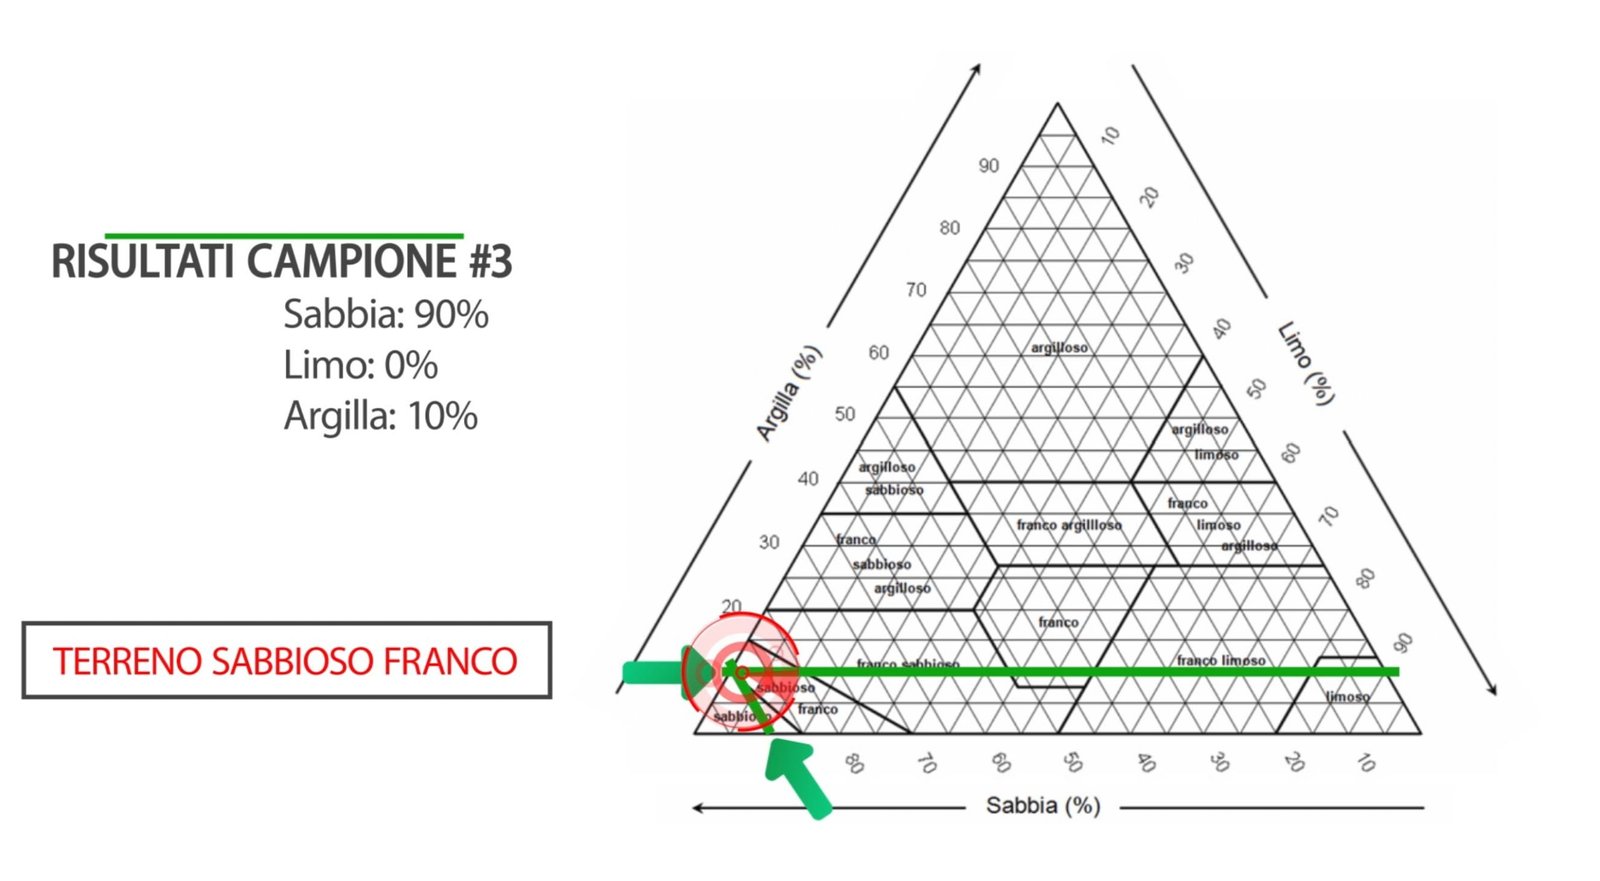
On the contrary, the third sample analyzed gives an obvious result also in the qualitative evaluation: it is purely sandy, very light and loose. Also in this case only some specific crops may find this type of soil suitable: very draining but often not very fertile and prone to retaining little water, with frequent risks of water stress for the crops.
HOW TO TAKE A SOIL SAMPLE
In order for a soil sample to be representative, it is useful to follow these instructions:
- Take multiple samples distributed over the plot of land
- Discard the surface layer of the soil, possibly the first 10-20 cm: they are exposed to atmospheric agents and may not match the characteristics of the lower layers in which the root systems develop
- Mix the different samples and extract a single sample, the sum of the previous ones.
- Start the latter with the above analysis.
In laboratories, the test involves further preparatory steps for the sample aimed at eliminating carbonates (by adding hydrochloric acid) and oxidizing the residues of organic substance (by treating it with hydrogen peroxide).
This refinement is required in the case of analyzes aimed at evaluating soils intended for cash crops; in the amateur context, the simplified version of the analysis that we have presented can give a useful and economical indication on the physical characteristics of the terrain.
latest posts published
Spring in stock: Preserve wild herbs and use them year-round
Everyone really likes wild herbs!
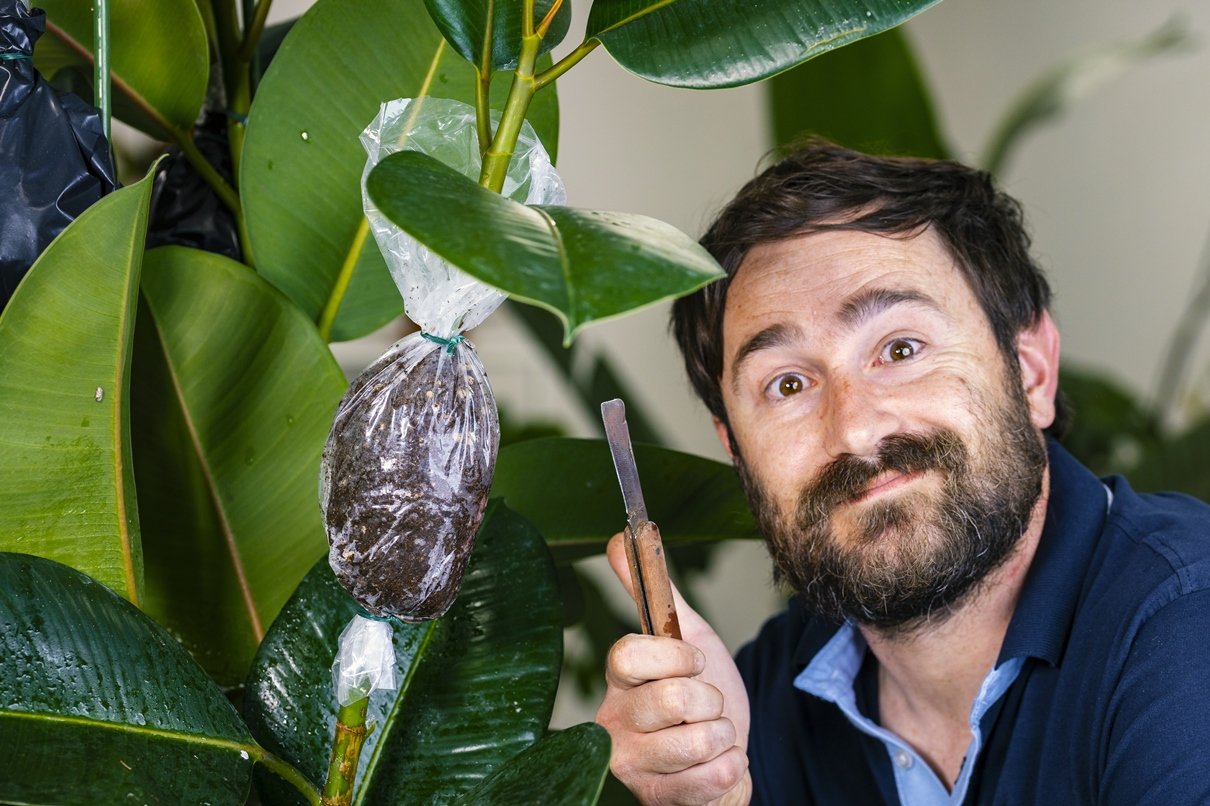
How to make air layering on indoor plants
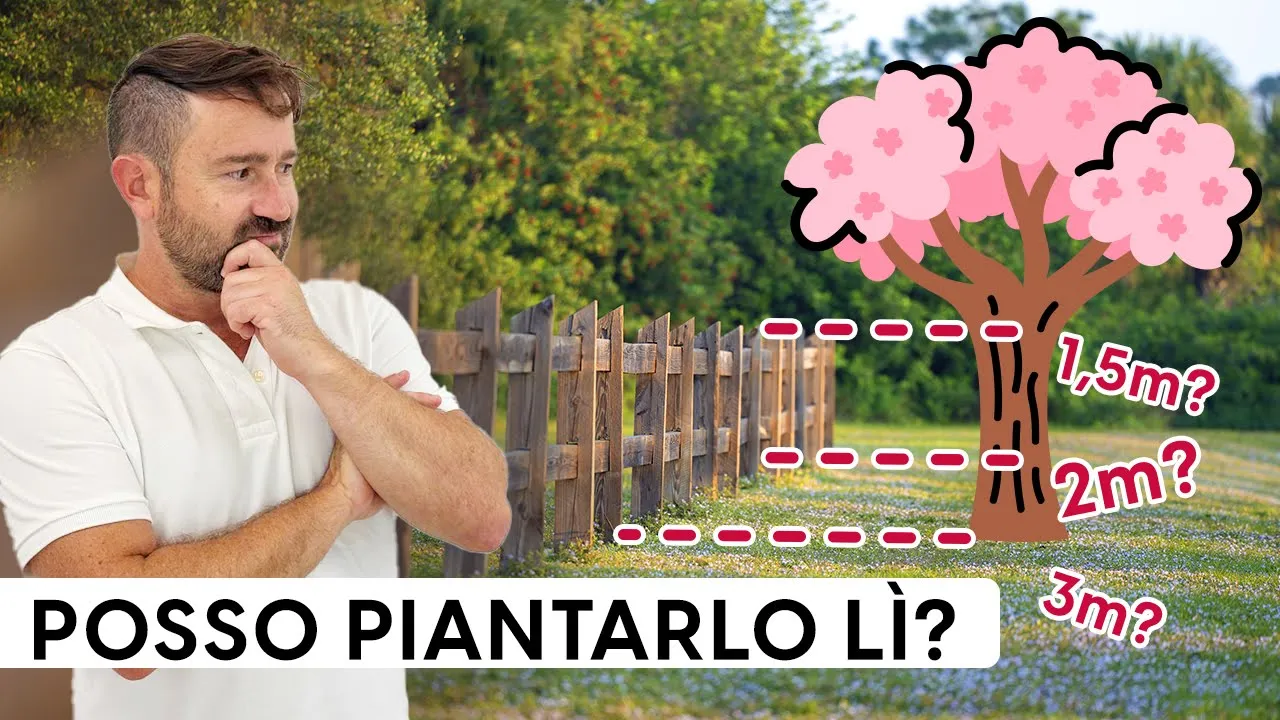
Distances of trees from the border: what does the law say?

Month of Festivals, Traditions and Taste
🌿 The cold is coming! How to transform the living room into an autumn relaxation corner

From Amaryllis bulb to plant: complete guide!

how to take care of it » Sell Plants Online

Here are the 12 best plants to purify the air (but it’s all false)