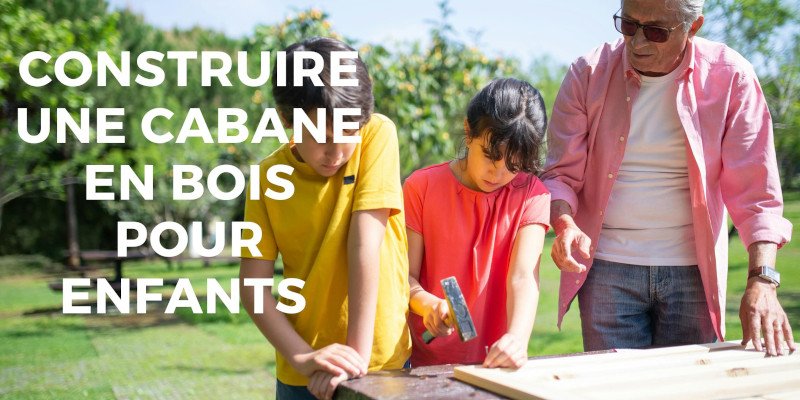
For their development, children sometimes need a space of their own, in addition to the bedroom. The children’s cabin fits into this logic. If you are a do-it-yourselfer at heart, you can build your own wooden playhouse for children. Its design follows several steps that we share in this article.
Earthworks
To begin with, remember that the space in which to house this child’s garden shed must be chosen taking into account some criteria, including orientation based on the direction of the wind.
First of all, you should not insulate the wooden children’s playhouse so that you can see your little one having fun. You will therefore have to choose the situation carefully.
Using piles, you can delimit the space in which your construction will be contained. You will then use a motor hoe to clear the grass up to a depth of 10 cm, also allowing you to level the ground.
Finally, it is possible to use a strip to flatten the surface and therefore facilitate the installation of the flooring.
Laying the floor
Given the quality of the wood, the thickness and the aesthetics, terrace boards are the most suitable for building a wooden playhouse for children.
They have a length of 240 cm and a width of 9.5 cm. Of course, it’s up to you to cut them to the size you want for your theater.
The addition of autoclaved pine sheets would give it considerable thickness, while adding an aesthetic side through a front terrace.
Before laying the slabs, the laying of sheets of polyane plastic material, connected to each other by notches, prevents the regrowth of the grass. This gives flatness to the ground and facilitates subsequent operations.
The walls of the baby’s cabin
A little geometry is needed here. The assembly of the walls begins with the installation of four slats measuring 40 mm x 40 mm and 1.20 m long. Two of which will occur 1.5cm from the edge of the rear corners of the floor. The other two 1.20 cm from the first.
To do this, you will need to use a framing square with sides of 5 and 10 cm. It will allow you to attach the cleats.
The actual assembly begins with installing the building’s back panel using two drywall screws and an electric screwdriver. Here the perpendicularity of the strips before screwing matters a lot, to avoid building an ugly house.
The rest is as simple as possible before the chair brackets are fixed at a distance of 50 cm from the perimeter of the construction. This operation helps to consolidate the bond between floor and walls.
This will be followed by the installation of the main partition wall which should ideally be one meter from the wall.
Discover our article: 5 ideas for personalizing and furnishing the wooden house for children in the garden
Windows, doors and roof
To finish building your children’s wooden house, here is the last step which consists of adding windows, doors and a roof.
Windows will be placed on each gable and on the rear wall of the child’s playhouse. Their frames will be made using structural battens.
A miter saw will be used to cut out the dimensions taken from inside the frame and the slats will be fixed with 25mm plasterboard screws. Fixing front and rear vertical slats. And the longitudinal connection of the building strips will support the roofing.
Cutting and installing the boards is the last step before getting the baby cabin roof.
Finally, the door of the children’s garden shed will also be of the same quality of wood. Of course, it must be cut to the required size. He’ll fix it all up with flat hinges before layers of paint top it all off.
latest posts published
Choose a water collector wisely! All our advice!

How to attract and feed birds even during the winter?
Summer irrigation – Guide to good practices

4 easy recipes with autumn fruit and vegetables #1

How do I calculate the filtration time of my above ground pool?

The robot lawnmower: why you will like it

How to choose a pool heat pump? Power, COP, criteria…
How can I clean the filter cartridge of my Intex inflatable spa?

Healthy spring shrubs